Table of Contents
Traditional interior insulation with vapour retarder
Quick link: download detailed instructions for interior insulation with EPS compound insulation.(German only)
The traditional solution works - if the conditions are right and the connection details are carefully carried out. Prerequisites:
- There shouldn't be any rising damp (German only) in the wall. Protection against driving rain should assured, there shouldn't be any leaking water pipes; if any of these issues exist, then they should be remedied first.
- As always with interior insulation: there shouldn't be any water-carrying pipes in the exterior wall which might freeze up.
The details for correct execution of the work can be found 

I the inner cladding must be airtight (German only) 1)) and vapour-retardant2)).
II the connections must be thermal bridge minimised (i.e. usually tapered/wedge insulation)
You don't have to calculate everything, because we have already calculated the most important details and have presented the solutions in such a way that they will work on the safe side. Because this assures thermal comfort over several decades, heating costs are saved and the building substance is protected as has been verified through example projects that have already been implemented for some time. (e.g. documented here).
The basic build-up
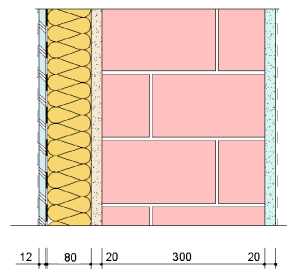
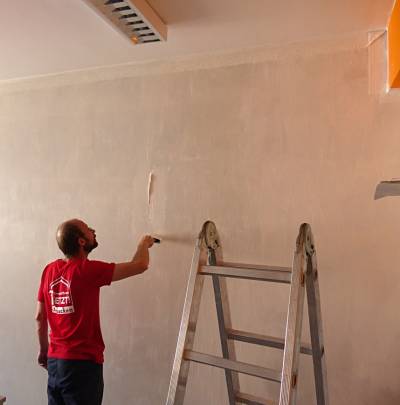
Step 0: Is it even possible? a) Is the wall damp? Then it must be dried out first. b) Is the old interior plaster and old wallpaper still in good condition? If not, then remove it and apply filling plaster if necessary, but let everything dry out first! c) Are there any water-carrying pipes in this wall? If so, then interior insulation will not be the right solution here! d) Is the exterior plaster in good condition (test by tapping on it!) and dry? e) Before any drilling and/or inserting of dowels takes place, it is advisable to identify the routing of electrical lines using a line detection device and mark these!
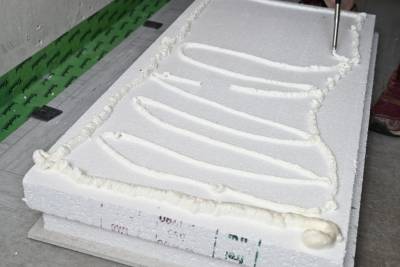
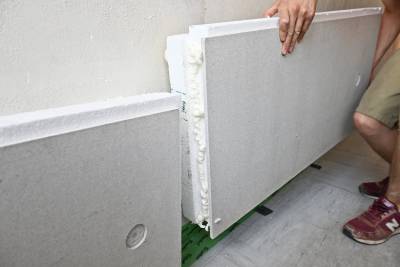
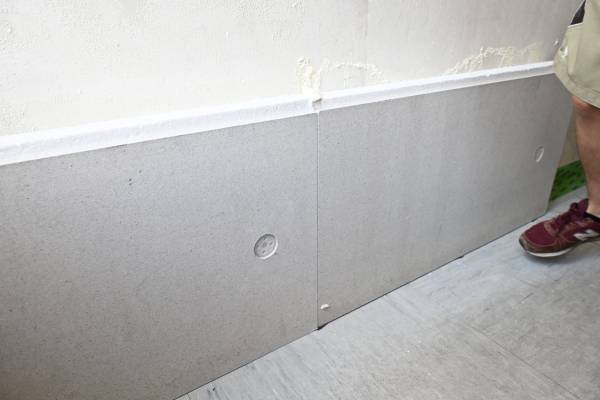
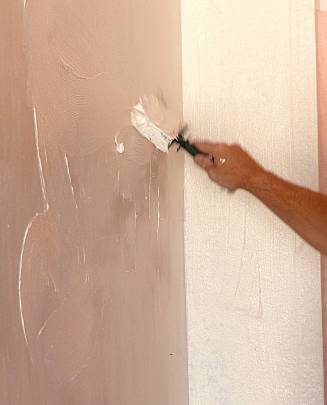
Step 1: Insulation panels are applied using adhesive and/or dowels on the old existing wall 3). In the process it must in particular be ensured that there are no continuous connected air spaces behind the panels: this is best done by applying a bead of adhesive all around, and each panel edge should be saturated with adhesive and joined without a gap. If any gaps do remain then these should be filled in using fibrous insulation material4)– and a plastic spatula/filler as a tool. In urgent cases these can also be filled using CFC-free construction foam.
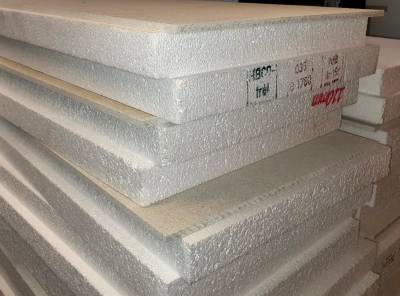
Step 2: the inner lining of the insulation is either already bonded with the panels (compound system) or is applied using adhesive or dowels in a second step. The cladding itself should be chosen with an airtight material (gypsum plasterboards are ideal, as are plywood boards or OSB, but the joints must be airtightly sealed in a durable manner, see Step 3).
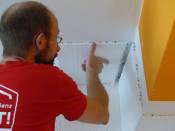
Step 3: The cladding panels must be joined airtightly with each other at the edges and in between, in such a way that warm indoor air cannot flow into the interior insulation construction; see also “"There should NEVER be any air flow behind interior insulation" (German only). For this we chose solutions which will remain permanently airtight (see airtight execution (German only)) - because there is often movement between building components, and the airtight layer must be able to tolerate and accommodate these. It is practical to directly connect the airtight layer with the vapour retardant layer - in every case this must be on the warm side of the construction (i.e. on the inside). The interior cladding may be on the room side of the vapour retarder - but does not constitute a significant part of the thermal insulation Innenverkleidung darf raumseitig der Dampfbremse liegen - allerdings kein bedeutender Teil der Wärmedämmung5). An airtight and vapour retardant coat of paint constitutes a simple solution if the vapour retarder is not already integrated into the cladding panel.
Typical connection details: airtight and thermal bridge minimised
Connection: flooring to interior insulation of exterior wall
key point: don't let there be any gaps, install in a flexible way and ensure that it is absolutely airtight here! There are three variants: using adhesive, elastic joints, elastic lips . Remove any carpeting in the area of the interior insulation and use diffusion-open tape at the edge strips of the screed6).
Connection: Interior wall to interior insulation of exterior wall
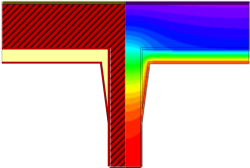
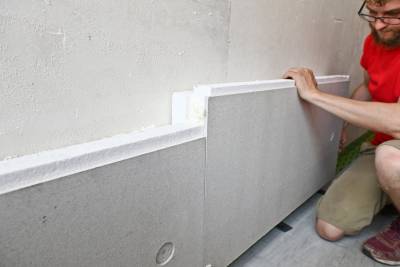
An interior wall of masonry conducts the cold from the cold exterior wall masonry towards the inside due to the bricks normally used here which have a high thermal conductivity. To avoid having a cold strip at this interior wall, the insulation here must be extended a bit further. This can be done least conspicuously by using tapered insulation: initially 20 mm, the insulation decreases to near zero and continues about 200 mm along the interior wall. As the temperature image shows, this ensures that low interior surface temperatures do not arise at any place. Alternatively, flanking insulation (20 mm) that extends approximately 25 cm can be implemented.
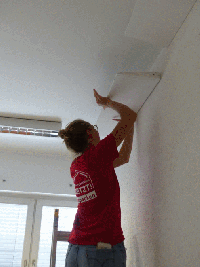
The insulation wedges are very easy to use, and may also be used without problem with the other interior insulation variants presented here. They only occupy a small area at the edge where the heat flows out and capillary conduction into the uninsulated inner (and warm) areas of the room often takes place. The EPs material used here has a µ-value between 20 and 30, which is adequate for protection of the no longer quite so cold interior wall or ceiling surface, but at the same time it is not so vapour-impermeable that this would be a problem with the diffusion open variants. These type of insulation wedge and also those made from wood fibre insulation boards or even calcium silicate are available on the market. All such insulation wedges may also be used in other systems – as we have described here, what matters is that adhesive should be applied in a way that prevents air flow behind these (in our case by means of a bead of adhesive all around).
Connection: window to interior insulation window reveal
Key point: basically the window reveal must ALSO be insulated when interior insulation is carried out. The wall surfaces would otherwise become too cold - causing damp spots. Space is always available for 20 mm capillary-active insulation material; but even if that is not possible, the capillary-active insulation wedge is a solution for this as well.
No abrupt end with interior insulation!
Key point: insulation should always be tapered off using wedge-shaped insulation.
And what about power sockets?
There are several possibilities in this regard:
- The easiest way is to insert an extension lead with multiple power sockets or even one of the latest power tower strips and then route the cable (in an airtight manner!) into the room.
- Another option is to use socket inserts to move sockets forward; smart sockets can even be used for this – which is entirely consistent with energy efficiency.
- If an electrician can be commissioned, it is also possible to move the socket forward into the new surface layer of the interior wall. However, one of the completely airtight empty sockets developed specially for Passive House buildings must then be used, which must also be airtightly incorporated into the composite board. For the interior insulation project in Tübingen 36 years ago, we achieved airtight installation by filling with foam, which also proved to be successful, but this is certainly the version involving the most effort.
What we DON‘T recommend: A hole in the insulation around the socket for easy access. The wall will then become especially cold here; condensation will almost certainly form here – which we don‘t want to have anywhere, especially not near a socket. So, choose Option 1 or Option 2! This applies for all of the interior insulation methods we have described: as mentioned elswhere, it is important to avoid abruptly ending interior insulation, in each case it should always be tapered off along a length of at least 200 mm (see above: insulation wedges).

Detailed instructions can be downloaded from here Interior insulation with EPS compound insulation. Note: all this information is available free of cost due to funding by the German federal state of Hesse. YouTube videos relating to this are also available within the framework of the “Efficiency Now!” campaign.
Note 2: This presentation and instruction were not sponsored by manufacturers of any of the products or tools used. If any product names are recognisable in pictures, then they are prototypical for usually a large number of comparable components, this does not constitute a recommendation for a specific product.
For specific application, we have used certified products for good reason, because among other things, for such components it has been independently verified that the specifications are also complied with in practice (and that very often, the required specifications exist at all).
Back to overview of "Structural measures for saving energy" (German only)
Back t overview of interior insulation of exterior walls (German only)
Alternative: Measures for insulation on the outside of exterior walls (German only)
Alternative: Thermal protection with a rainscreen façade /curtain wall façade (German only)
Alternative: Plaster base formwork for retrofitted loose-fill insulation (German only)
Overlapping information on thermal protection measures for buildings

